This is the big one...going into this project, we knew it was going to be a big overhaul. When you remodel a kitchen, you are remodeling the heart of a home.
High level review, here's the before
and the after! There are a lot of pictures for the in between...
Now, back to the "before". These cabinets and wall will be removed.
The pantry area will turn into our dining area
The peninsula will disappear
This is in the "dining" room. This window will get replaced and not come down as low to allow the new counter top to come across. I cut a few "access" holes to make sure I knew what was inside the wall!
Dining room will change and the new stove will be about where the table is
Looking into the library/toy room, I added a wall here and the pantry and refrigerator move down to this corner.
Looking back toward the kitchen...let's get to work!
First we started taking apart the old dining room. My helpers know how to use a drill, so they got to work taking apart the bench seat!
We hit a warm weekend in January, so I was able to get the windows swapped out. We got the floor pulled back and the new wall frames out!
Demo day! Boys grabbed hammers, crow bars and safety glasses! We made quick work of the old cabinets.
Once we had the upper cabinets out, we started in on the wall!
Heather and I planned our new kitchen out on Ikea's kitchen planning software. After working out all the details, we could save our plan to their server and then pull it up in the store. A quick day trip to Kansas City pulling a small U-haul trailer and we've got ourselves a new kitchen (some assembly required)! We are big fans of Ikea's kitchens, we put one in our Beaverdale home too and couldn't be more pleased with the results! And they have made some nice improvements since our last kitchen remodel in 2009.
I took a week off work and we got to it. I tore the ceiling down, we had thick popcorn ceiling, so instead of trying to scrape it and patch holes for the new electrical line, we just pulled the whole thing down and started fresh. It worked way easier!
Through the process we managed to keep our dining room table the center of the kitchen...
and regardless of where we were in the project, family supper time at the table happened every night! Blythe approves of the renovation!
We did hire an electrician to run all the new lights and a plumber to move the sink to under the new window.
Since our basement is finished, the plumber ended up working through the floor to move the existing water lines and hook up the new sink.
Old wall removed and the back of the house is now opened up! This is the view from the fireplace...
...and looking the other way!
After the electrical was roughed in, I hung the drywall.
My dad brought up a drywall lift, that was a huge help! I was able to hang a lot of the drywall myself and with 9 foot ceilings, I'm not sure how I would have done that without a lift to help!
Here is the start of the pantry being build out and the new spot for the fridge.
I did hire guys to mud, tape and texture. They did an awesome job and got it done quickly (worth every penny)!
While the plumbers were working in the kitchen, my dad and I were assembling cabinets in the garage...25 cabinets in all. After the texture was dry, we did a massive clean up and wiped everything down. Then I put the floor back together and started installing base cabinets. Ikea's cabinets work on a rail system. You anchor the rail to your studs on the wall then slide the cabinets on. The base cabinets have adjustable legs to get everything level...it's pretty slick.
While we had everything masked and taped off to texture the ceiling, I borrowed a paint sprayer and gave the built in's another coat of white!
New stove put in place and hooked up!
Base cabinets installed! In this picture you can see the pipe running across the top of the wall. When the plumbers hooked up the new sink, they needed to run a vent pipe. The "easiest" way to do that was to tie into the master bathroom that is above the kitchen and that was as high as they could "tuck in" the pipe...minor details but one I would have to fix/work around later in the project!
Pantry shelves installed and new fridge put in place!
What do you do with empty base cabinets that have the door attached...play hide-n-seek of course! Perfect spot of 2 boys to hide!
Upper cabinets going in!
Starting to come together and look like a kitchen
One last picture with the "temporary" light fixtures...
Our electrician came back and installed our lights! We went with LED can lights and these that our electrician uses are 1/2 inch thin, so they are the same thickness as the drywall!
And our 2 pendants over the table, those coordinate with the sconces by the couch!
Our new grid of lights, all on dimmers and we can now light up the whole room! This is a huge improvement from the 3 lights that we previously had to light up our space!
The pantry all lit up!
And the under cabinet lights!
We added two cabinets above the fridge and then I build a big chalkboard to box out the fridge.
I added a hood above the stove
and the start of Heather's desk.
Framed out the hood with trim and corbels
Counter top day! This was a big day, our counter tops got installed! We used
Stone House Granite and they did a great job.
Another look
Our counter tops quartz made by DuPont - Zodiac called Status White. They have some subtle gray tones in them and we just love them!
Crown molding starting to go in, giving the cabinets a hat to wear!
All lit up (most of my pictures are at night, because that is when I work on projects...after the kiddo's are asleep)
Heather's desk, she wanted a simple workspace that could hide her laptop...
so it is a simple drawer that slides in and out and all the cords run through the back. Our electrician put in outlets that are high enough up to hide them, it turned out great!
The chalkboard framed out with reclaimed lumber (same stuff we used on Heather's craft table in the basement)
And the hood build and painted!
Back splash will be simple white subway tile and white grout (still finishing that up)
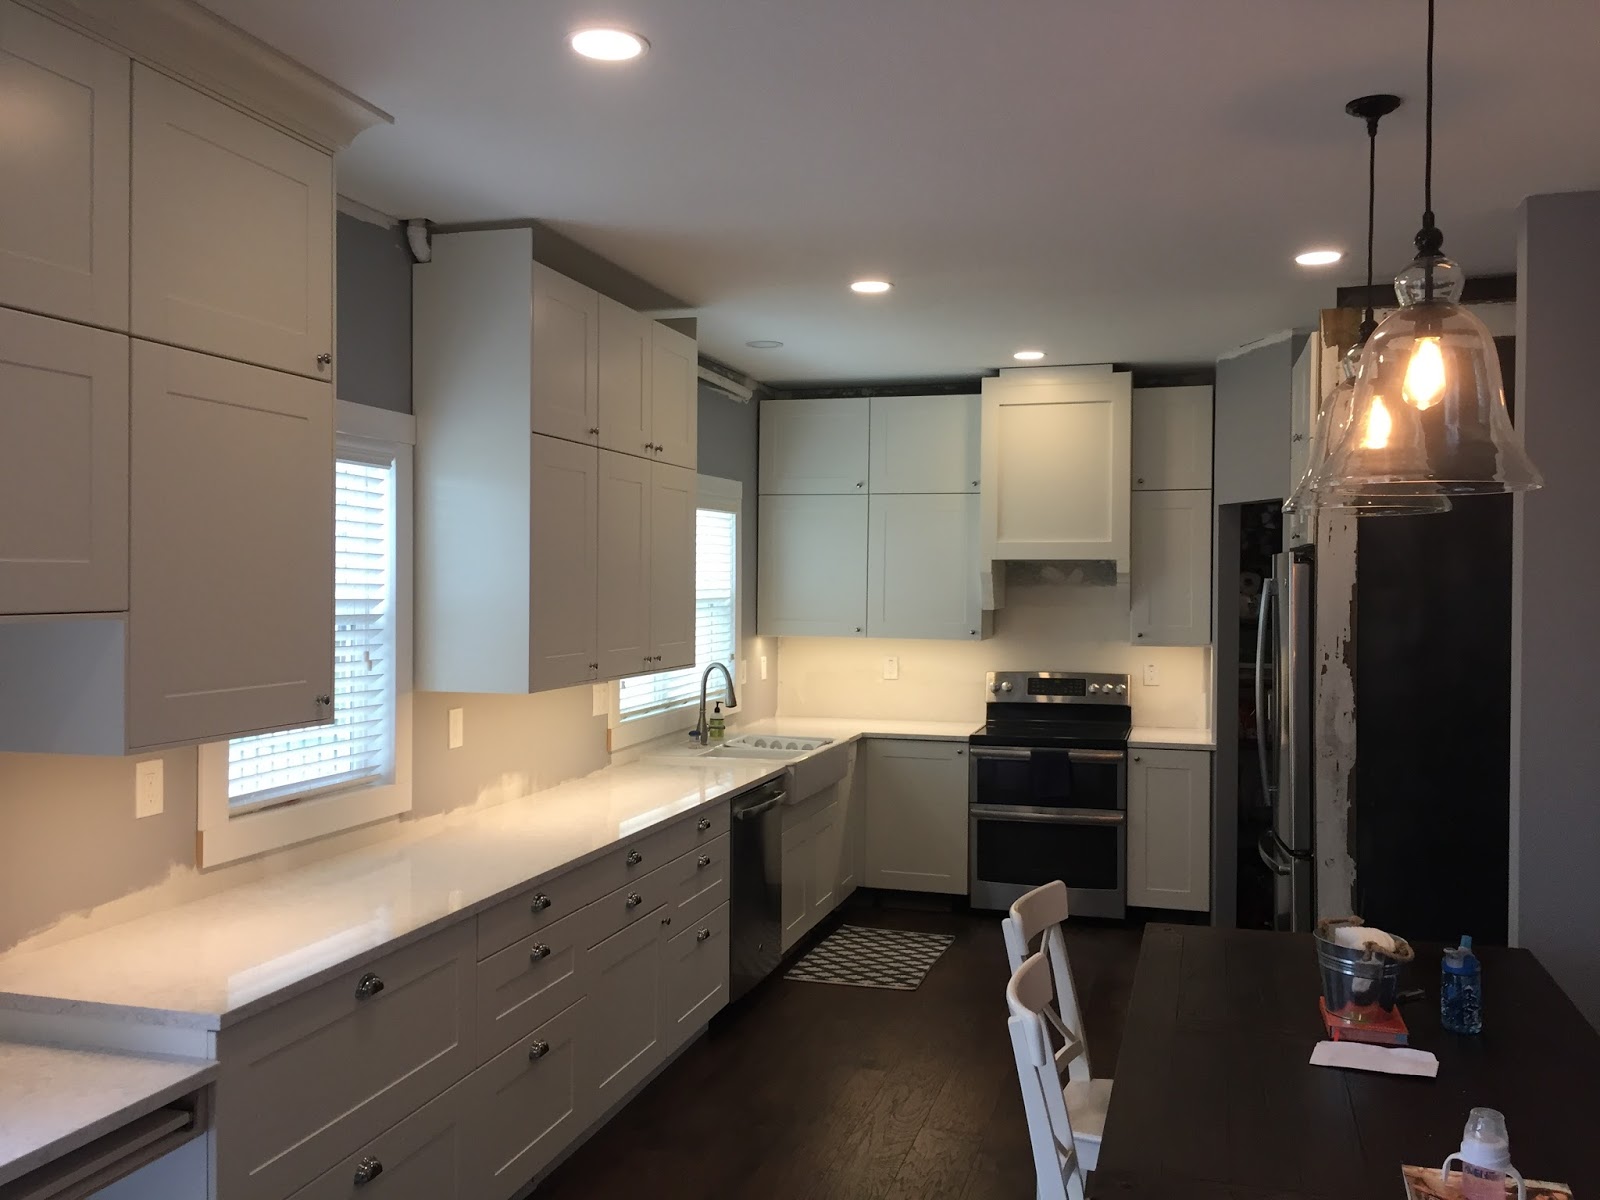
If you look closely, this is the picture that shows how I hid the pipe. I build a small bulkhead and wrapped it with crown molding, it hides that pipe fairly well!
I still have a few small pieces of crown to finish...but we are almost done! That and the back splash
And there you go...our new kitchen!
Looking the other way.
We love the space we now have and room to host people! I still need to finish the back splash and then we will build a bench against the wall for seating at the table, those projects are coming. It was a lot of work to fit into 3 months, but we are very pleased with the results.