We are just wrapping up phase 1 of our basement remodel. This remodel was fairly extensive, involving tile, board and batten, dry wall repair, adding windows replacing another window, new lights, paint, carpet, built ins...kind of the works! This was about a 3 month project, so there are several pictures along the way. If you don't want to see all those, I will start with the after pictures.
Here is the remodeled basement, the fort still needs the last coat of paint, but that will happen
Another view of the new basement.
Now let's see where we started. This is the before, there was an artificial rock wall on one end of the basement. The stones were made of foam and cement was the mortar between.
On this wall, we pulled that window out and replaced it was a long narrow window to give added privacy and bring in more light, then we added two more long narrow windows along this wall. If you look in the window you can see a gray line, that's the street outside. With that big window, it felt a little like a fishbowl, in that everyone who drove by could see into our basement.
This wall gets the new windows...
Following that wall around we see the sliding glass door and the small wet bar that sticks out in the middle of the room.
Another shot of the wet bar and the square area that has tile. The previous owners had a pool table in the basement and had it sitting on the tile.
Corner that will get eventually have the fort
Hallway with some very outdated wall sconces
Another shot of the hallway and stairwell. And that is the basement...before we started working.
Now, let's get to work. My two helpers in demo made quick work of the rock wall!
Removing drywall for the new window...this outlet needs to find a new home.
New windows installed!
A pic of all 3 new windows, next up, tile work.
We laid tile on half on the basement floor...about 300 square feet of tile. We really like the look of the tile that looks like wood floor. We found this
black walnut porcelain tile from Lowe's.
It went down great and then we grouted everything. We went with a dark grout called Black Bean.
Trigg liked helping, especially when he got to wear the knee pads and make "roads" with his sponge!
After the floor was finished, we got to work on the board and batten. We put up 1/8 inch masonite board as the backing. We used 1x6 mdf boards for the baseboard and 1x4's for the top board and the battens. With having so much of it, we spaced the battens at 2 feet apart, that way we covered each seam and hit studs!
Once the wall was up, we got to work priming everything, Trigg was a big helper!
Garrett working on his "cheese" smile and Trigg showing his paint brush. Garrett usually found one glove to wear and he did a great job helping clean up!
Starting to look like a basement again...time to pick out carpet!
Down the hallway, wall lights removed and can lights added...
another look down the hallway...new doors ordered and on their way!
Tile floor complete, board and batten complete....
Time to set up train tracks and get out the paint sprayer!
We masked off the tile floor and used a paint sprayer to paint the board and batten and the trim work. It is a lot of prep and clean up work, but the sprayer is quick and the finish is great!
Down the hallway, fresh paint and patched holes! Next up, the fort!
I found plans on
Ana-White.com for this
loft-fort with storage, I made a few modification to fit our space...
The fort is taking shape
Steps added, the steps are hinged for toy storage under each step
The fort is a big hit!
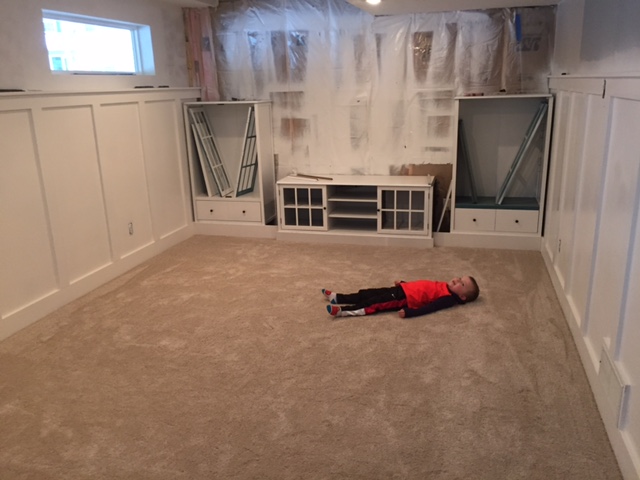
Then the carpet came, Trigg loves the carpet...so cozy!
Testing out the fort, smiles from everyone!
We had some left over carpet and pad...so the fort got a little more cozy! I laid the pad and carpet on the top level of the fort...perfect for snuggling or napping!
We added cabinets and a media shelf, I made some slight modifications to the design to turn them from 3 pieces into 1 piece unit. Then we added ship lap to the wall...
Finished ship lap wall
Pieced together to look like a built-in unit.
New doors painted and installed, fresh coat of gray paint added.
Everything got one more coat of paint
And we are ready to decorate!
Here is a look around at the finished product
The new windows
We kept the tube the carpet came on, its perfect to race Hot Wheels down from the fort!
Finished
We just need some furniture and our basement will be ready for movie night!
I still need to finish the stair well and then it is on to phase 2 of the basement project...adding a bathroom and egress window in the bedroom...to be continued...