Monday, November 18, 2013

Barn Door

I realized that I hadn't posted any pictures of the Barn Door project (thanks for the comment Elizabeth!)  We love the idea of a barn door and we were trying to figure out where to utilize one.  We thought it would be a great addition to the main floor powder bath.  Our good friends, the Phillips, have an old family farm with some old barns.  We bought the hardware from them.  I gave the rail a good sanding and then a fresh coat of black paint.
 I was able to hit two studs on both ends of the rail.  For the middle bolt, I cut a hole in the drywall from the bathroom side and added some bracing to make sure it won't fall down.
 The rail is secure and ready for a door!
 The door hardware needed some work, I ended up cutting off the old wheels and added new ones.
 For the door, I used pre-primed mdf boards and used a Kreg pocket jig to make pocket holes...
 All laid out...
 ...with pocket holes to attach everything together.
 The planks attached together.  I then added the front board to make the frame and attached the brackets.
 ...and hung up and ready to roll!
 Added a handle and we have a functional bathroom door!
It took a little work to adjust the rollers so they will slide inside the rail, but after some fine tuning the door is working great!

Coat Closet

Time for another home project update!  Today's feature...the coat closet.  For those of you that don't what the details of the project, here is the before...
 ...and here is the after.  Old doors removed, barn door for the bathroom and open space for the coat closet.
 Now for the details.  We started during "construction week" by pulling out the old doors...jambs and all.  Brent helped me add new dry wall, metal corners and get everything taped and mudded.  We then used a can of spray texture to put the final touch before painting!
 Then to the stencil, I started at the bottom knowing that there would be a bench to cover it up if I messed up...I used a repositionable spray adhesive on the back, that way I could move and stick the stencil as I went!  The stencil is a 16 x 16 square...so two blocks down...lots to go!
 I worked my way up the back wall, bending the corners as much as I could.
For the bench, we used two of Ikea's Expedit cubes and secured them to the wall.  Then cut a slab of mdf for the top.  Then Heather found a foam pad for the top.
Heather also found some old pillow's at Goodwill for $2 or $3 each.  Then she found these great pillow covers at Hobby Lobby for $5.  New pillows for under $10!
Then we added coat hooks to the back and side walls to hang our jackets!
I ended up creating another stencil from a sheet of leftover vinyl to paint the corners, it was easier to bend and seal into the corners.
The finished product, baskets under the bench have our hats and gloves.
We still need to find a fabric to cover the bench, but it is pretty much finished!

Thursday, October 31, 2013

Halloween

The end of October is here and Halloween is upon us.  That means it was time to carve our pumpkins!  
Mom asked Trigg, "What do you want carved into your pumpkin, a happy face, a scary face?"  
Trigg replied "An airplane!"  
To which Mom responded "Great, Dad can help you with that"
So we came up with a plan for an airplane!
 When we snap pictures, we have been asking Trigg to "Show us your teeth"... and he did!
 First things first, pull out the pumpkin guts...Trigg wasn't too sure about sticking his hand into the pumpkin.
 Look at all those pumpkin guts and seeds!
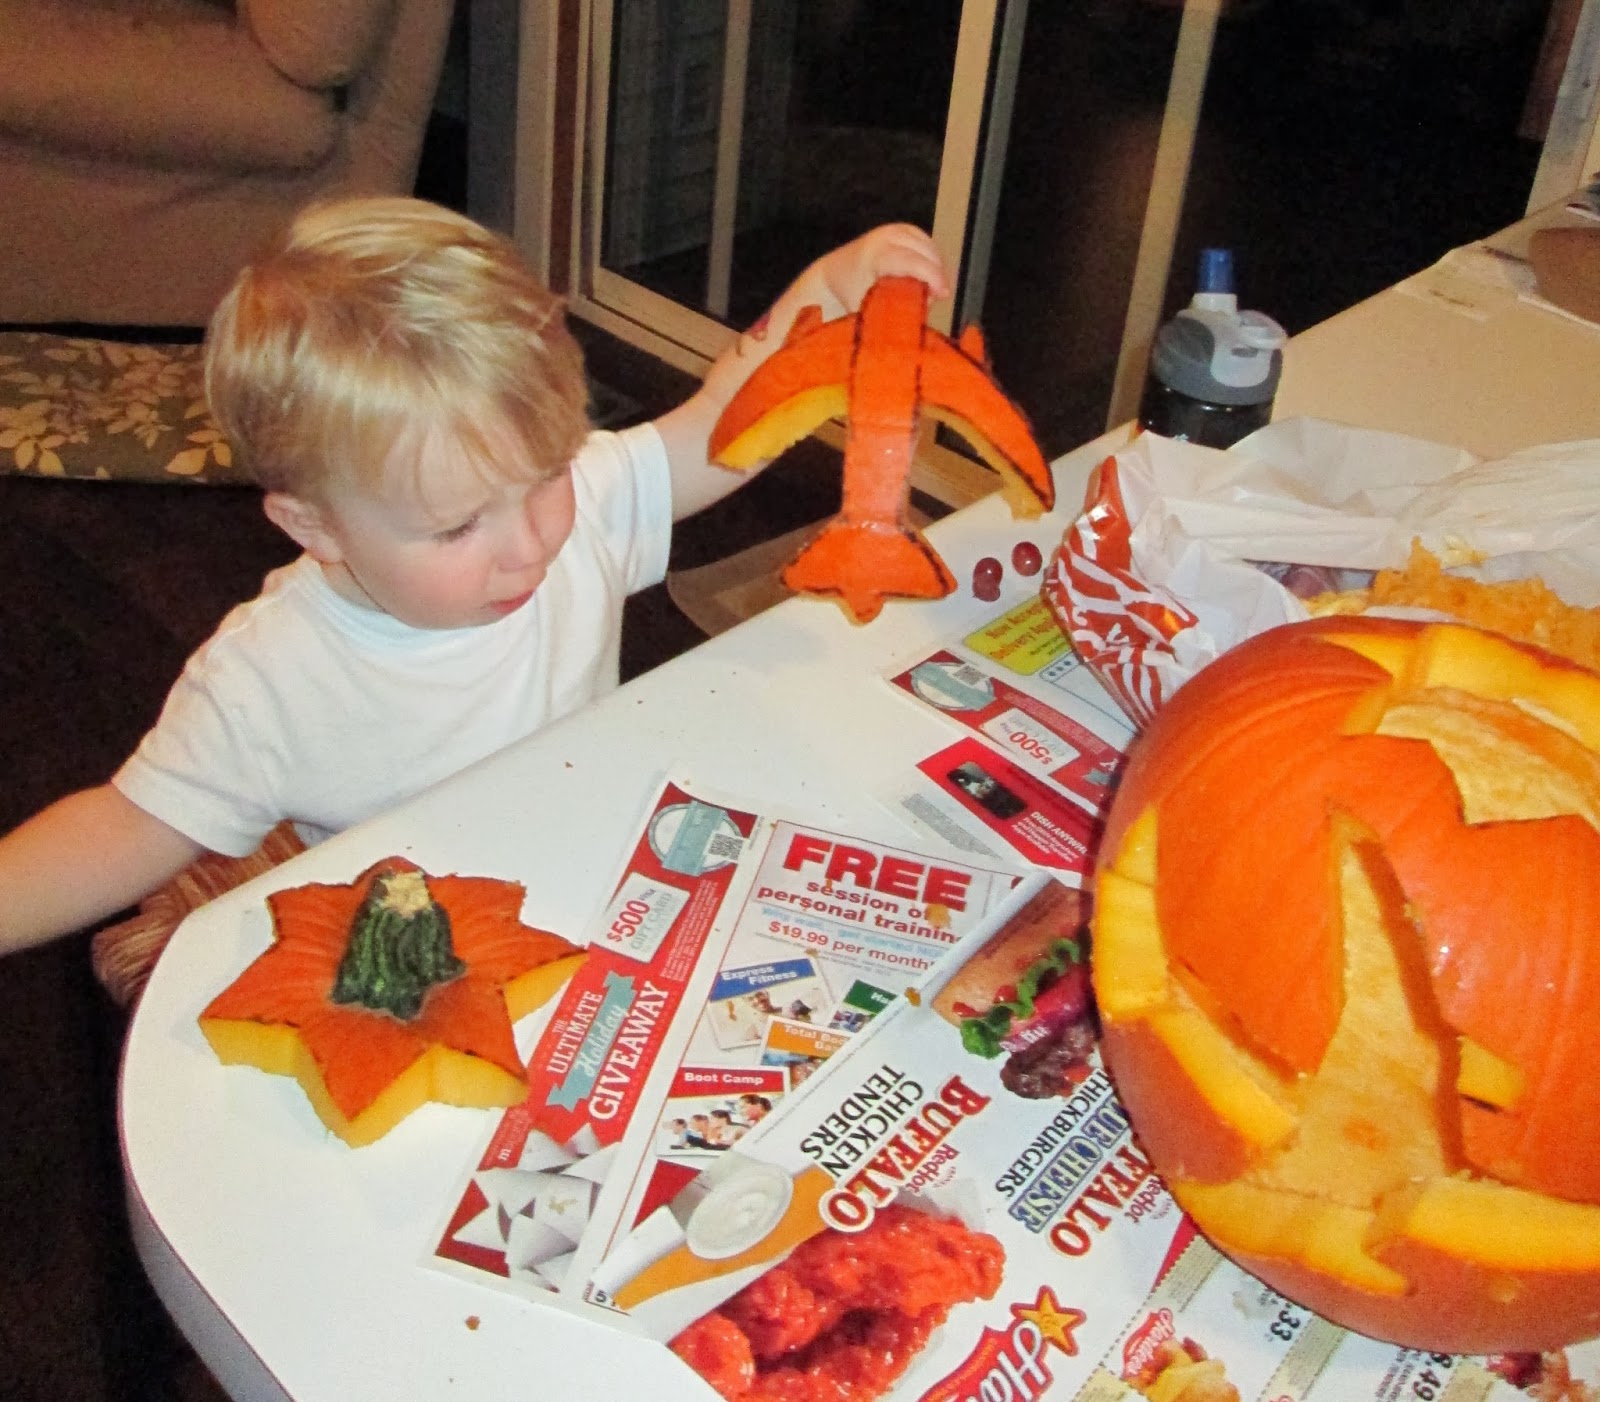
 Step 2 - cut out an airplane.  Trigg took the airplane for a flight around the kitchen!
 Airplane pumpkin...check!
 We put a candle in the pumpkin to see how it would glow!
 "Look at that plane!"  Trigg exclaimed.
 Mom's turn to carve her pumpkin...she used some power tools!
 Mom & Trigg with their pumpkins!
 Trigg getting a closer look.
 Mom and Trigg with their finished products...good work you guys!
 Then we turned the lights off and let them glow!
 Last night was "Trick or Treat" night, our little elephant was on a stampede.
 We made the trip around the block and then headed back home to help Mom pass out candy!
We had lots of kids stop by and Trigg had a great time!  As he was running down the street he would say "Elephant on the move!"  It was too cute!

Monday, October 28, 2013

New Front Door...feels like fall

With the weather being nice this past weekend, it was time to tackle the new front door project.  Here is a before picture of our front door.  The tricky part is these doors come as one giant unit, windows and all, but we really like the windows, we just wanted to swap out the door...
 The old faded green door needed to go!
 Here is the old door from the inside.  So we bought a new door...
 Here is the new door from the inside.  It took some work to get the new door to fit into the old hole.  I had to chisel out new hinge pockets and shave a bit off the top of the frame...but after a few hours of reworking...it fits!
 We gave it a couple coats of exterior paint, we went with Valspar Dark Kettle Black from Lowe's.
 Here is the front door from the outside...looks like fall!
 Speaking of fall, Heather found our fall decorations from one of our boxes!
 Pumpkins, wheat stalks and falls colors can be found in our house!
 With lots of fall colors outside too!
Fall is in full swing and so are the house projects!  More to come!

Entryway

We have a tall entryway that needed painting... it was time to break out the extension ladder and paint plank to get this job done!
 My extension ladder streches out over 20 feet, so I was able to reach the top
 I also used an extension pole connected to my roller, extending my arm reach from 2 to 8 feet!
 My process was to edge the top and roll one roll from the extension ladder and then switch and use the extension pole from my 12 foot folding ladder.
 It work great until I got above the stairs...then I hit a spot where I reached as far as I could from te extension ladder and as far as I could from my folding ladder and couldn't reach about a 18 inch section...
 So I taped my brush to the end of my extension pole...problem solved!
 After I got the top edged out, I used this long paint plank from the top of the steps to the top of my folding ladder to paint the rest of the wall.
 I also got the front door trim primed while I was at it.
Fresh coat of paint makes the entryway feel clean and fresh!
 ...now just to paint that window trim...